Can You Install an Electric Shower Over a Bath? Safety, Layout and Installation Considerations
Installing an electric shower over a bath is one of the most practical upgrades you can make to a UK bathroom. Electric showers heat water instantly as it passes through an element, drawing from the cold water mains rather than relying on stored hot water. That independence from your existing hot and cold supply means simpler plumbing, fewer pipe runs, and reliable showering even when your combi boiler or cold water tank fails. But the installation involves strict electrical and building regulations, careful waterproofing, and precise positioning. This guide covers every step, from what you need before you begin through to testing your new shower, so you can decide whether to fit an electric shower yourself or bring in a qualified professional.
Is It Possible to Install an Electric Shower Over a Bath?
Fitting an electric shower over an existing bath is a common arrangement in UK homes, particularly where space rules out a separate shower enclosure. Electric showers can be fitted in any bathroom, provided the cold water supply delivers adequate pressure and the electrical supply meets the unit’s demands.
Unlike a mixer shower, which draws water from existing plumbing systems (both hot and cold supply pipes), an electric shower unit only requires a cold water mains supply. That makes it a straightforward option for homes where running hot pipework to the bath wall would be disruptive or expensive. A power shower, by contrast, requires both hot and cold water supplies and often a shower pump, adding complexity and cost that an electric shower avoids entirely.
The approach works with most bath layouts and sizes. Acrylic, steel, and cast iron baths can all accommodate an over-bath shower, though each material has specific fixing and bonding considerations (covered below). The main constraints are wall condition, water pressure, and whether your consumer unit can support a dedicated high-current circuit. Digital showers offer precise temperature control and remote operation, but for most over-bath setups, a standard electric shower unit remains the most practical and cost-effective choice.
What You Need Before You Begin
Gathering the right materials, tools, and safety equipment before starting prevents delays and reduces risk. Here is what the job requires.
Electrical requirements. Electric showers typically require a heavy load between 8.5 kW and 10.5 kW. A 10 kW unit at 230 V draws roughly 43 to 44 amps, so electric showers require a dedicated heavy-duty cable, typically sized at 10 mm². The circuit must run independently from the consumer unit to a double-pole isolator switch located outside the bathroom. Electric showers must have a dedicated circuit and protective device, including RCD or RCBO protection. Electrical installations in bathrooms are subject to special requirements under Part P of the UK regulations, and a Part P certified electrician is required for electrical work unless you are registered with a competent person scheme.
Plumbing requirements. Only the cold supply is needed; standard pipe size is 15 mm copper or plastic. If your home runs on gravity-fed systems with low pressure from a cold water tank in the airing cupboard, shower performance may suffer. Mains-pressure cold water supply is ideal. Keep a pipe cutter, compression or push-fit fittings, and PTFE tape to hand.
Wall preparation and waterproofing. Surfaces within the shower zone must resist moisture. NHBC Technical Guidance 9.2/06 (November 2024) specifies acceptable substrates for tiling: water-resistant plasterboard (Type H to BS EN 520), fibre cement board, or equivalent. Waterproofing is crucial when adding a shower over a bath; if water flow exceeds approximately 12 litres per minute (power shower level), a tanking membrane or liquid waterproofing layer is required beneath tiles.
Tools and safety equipment. You will need a masonry bit, drill, spirit level, stud/pipe detector, wall plugs, screwdriver set, adjustable spanner, and safety gear (gloves, goggles). A voltage indicator is essential for confirming that mains electricity is fully isolated before you begin any electrical work.
Measurements and positioning. The area above the bath up to a height of 2.25 m is classified as Zone 1 in bathrooms. Equipment in Zone 1 must have a minimum IP rating of IPX4 and be protected by a 30 mA RCD. Position the shower unit at a height where the shower head sits comfortably above head height, but the spray stays within the splash zone. Space around the shower unit must allow for servicing; check the manufacturer’s instructions for minimum clearances. Always detect hidden pipes and electrical cables before you drill holes.
Step-by-Step Installation Process
Installing an electric shower above a bathtub requires adherence to UK building and electrical regulations. The process divides into six stages.
1. Safety procedures. Always turn off the mains electricity before installation. Isolate the water supply at the stopcock or isolating valve. The main power supply must be isolated and tested with a voltage indicator before installation. Turn off the mains electricity and water supply first; do not rely on a switch alone.
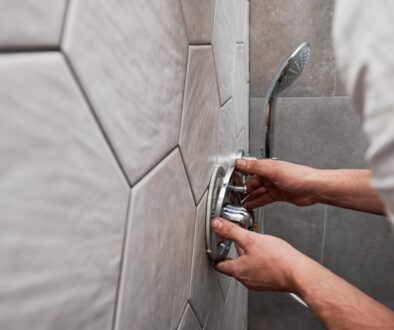
2. Marking and mounting. Hold the shower unit backplate (or use the supplied template) against the wall at the desired position. Mark the position for fixing holes before drilling, checking for concealed pipework and electrical cables with a detector. Use a masonry bit to drill holes for the shower unit. Insert wall plugs appropriate for your wall type. If the wall is plasterboard over timber stud, use heavy-duty fixings rated for the weight of a filled unit. Use safety clips provided by the shower brand for security.
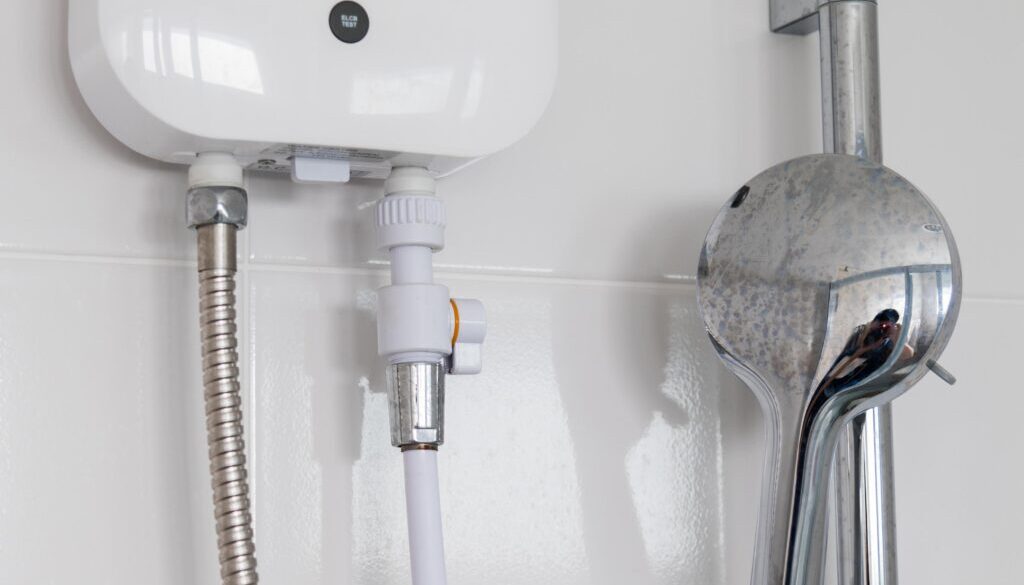
3. Water supply connection. Run a 15 mm cold water supply from the rising main or a dedicated branch. Cold water supply connected to electric showers must be thoroughly flushed to clear debris before use; particles in new pipework can damage the heating element and flow valve. Connect the pipe to the unit’s inlet (bottom, top, or rear entry, depending on the model) using compression fittings. Ensure the water supply is isolated before starting installation, and do not restore flow until all joints are tightened.
4. Electrical connections. This stage is where the legal requirement is strictest. Hire a Part P certified electrician for electrical work. Qualified electricians should perform electrical work in bathrooms due to inherent hazards. The electrician will run the heavy-duty cable from the consumer unit to the double-pole isolator switch, then into the shower unit. Connect the live, neutral, and earth wires to the shower unit’s terminal block, ensuring the earth terminal is tight and that all exposed metalwork (bath, pipes, shower rail) is bonded. Consult a professional if unsure about electrical connections; mistakes here risk electric shock or fire.
5. Fitting the shower rail, hose, and handset. Position the shower rail so the shower head clears the tallest user’s head. Drill holes, insert wall plugs, and fix the rail brackets at a spacing that keeps the rail rigid. Attach the shower hose (a short length is better for over-bath setups to prevent the handset dragging on the bath surface). Choose a handset with adjustable spray patterns suitable for an over-bath arrangement.
6. Testing and final safety checks. Secure the shower unit and check for leaks after installation. Restore the cold water supply and run the shower on cold to check every joint and fitting. Then have the electrician energise the circuit, test the heating element, confirm water heats correctly, and verify the RCD trips when tested. Label the isolator switch clearly.
Electrical Safety Considerations
Electrical work in bathrooms carries specific legal obligations under Part P of the Building Regulations. Any new circuit for an electric shower is notifiable work. If the installation is not carried out by a competent person registered with NICEIC, NAPIT, or an equivalent scheme, you must notify Building Control before starting, and the work must be inspected.
Bathrooms are divided into zones 0, 1, and 2, each with rules on what equipment and IP rating are acceptable. The electric shower itself sits in Zone 1 and must meet a minimum IPX4 rating. Zone 0 (inside the bath or shower tray) requires IPX7 and SELV equipment only. All wiring must comply with BS 7671:2018+A2:2022.
Earthing and bonding are non-negotiable. Metallic bath tubs, exposed pipework, and the shower unit enclosure must all be connected to the earth. Supplementary bonding may be needed where extraneous conductive parts exist. Every new bathroom circuit must be protected by a 30 mA RCD.
Plumbing and Waterproofing
Electric showers only require a cold water supply, so performance depends entirely on mains pressure and flow rate. If your home has low pressure or you are on a gravity-fed water system, select a shower unit rated for low-pressure operation. A plumber can measure flow rate at the point of connection to confirm suitability. Adding a shower requires proper plumbing connections; poorly joined pipework is the most common source of slow leaks behind walls, so many homeowners choose professional bathroom plumbing services to ensure everything is installed correctly.
Waterproofing the wall behind the shower is equally important. Use waterproof tile adhesive, solid-bed tiles, and waterproof grout. At the joint where the bath meets the wall, fit an upstand or use a flexible sealing kit, then apply a continuous bead of silicone sealant at corners. If you need to re-tile the wall, choose a moisture-resistant substrate first. NHBC guidance (Tables 1 and 2) sets out which substrates require a full tanking membrane and which need only water-resistant adhesive and grout. A bath screen or splash panel reduces the volume of water reaching the wall tiles, extending the life of your waterproofing.
Professional Installation vs DIY Approach
Replacing an old electric shower (swapping an old shower unit for a new shower of the same wattage, using the existing cable and pipe run) is generally simpler and cheaper than a first-time install. The plumbing and cable are already in place; the job takes a qualified plumber and electrician two to three hours.
On the legal side, a Part P certified electrician is required for any new circuit or modification to an existing circuit in a bathroom. Without certification, your home insurance may not cover damage caused by the installation, and you may face difficulties when selling the property.
DIY plumbing (connecting the cold supply, fitting the shower rail and hose) is permitted, but the electrical work is not something to attempt without registration. Mistakes in electrical work risk shock and fire; plumbing leaks behind tiles cause damp, mould, and structural damage that costs far more to fix than the original installation. Many manufacturers also require proof that the shower was properly installed by a qualified electrician and qualified plumber before they honour warranty claims.
For a standard electric shower over bath installation (existing cold supply route, no substrate replacement, walls already tiled), a professional team typically completes the job in four to six hours. More complex installations, involving cable routing through multiple floors, consumer unit upgrades, or full wall preparation, may take a full day or two.
We handle the entire process, from initial survey through to final test and certification, so you receive a single quote covering all trades. Homeowners across the county rely on our bathroom installation services in Essex for complete projects that include electric showers as part of a wider refurbishment. Explore our full range of shower installation services to see what we cover.
Why Choose Mermaid Designs for Your Electric Shower Installation
We carry out electric shower installations over baths from start to finish. Our team includes both qualified electricians and qualified plumbers, so there is no need to coordinate separate tradespeople, and our expert bathroom installers in Thurrock manage every stage of the job. Every installation we complete is Part P certified and wired to BS 7671:2018+A2:2022.
We handle wall preparation, waterproofing, and tiling to NHBC and local authority standards, selecting the correct substrate and membrane for your specific water system and flow rate, and can integrate your electric shower into a wider bespoke bathroom design tailored to your needs. If your home has low pressure from a gravity-fed cold water tank, we advise on the right unit wattage and, where needed, alternative supply arrangements. If your existing bath is metallic and requires supplementary bonding, or acrylic and needs reinforced fixing points for the shower rail, we address that during the survey rather than discovering it mid-install.
Every job includes full testing, RCD verification, and a completion certificate. We also provide aftercare: if a connection develops a fault or you need the old unit replaced in future, you have a direct line to the team that installed it. Our expert tips and local knowledge mean we anticipate problems (cable routes through older London properties, insufficient consumer unit capacity in 1960s boards) before they become costly surprises.
Conclusion
Fitting an electric shower over a bath is a practical, space-efficient upgrade that gives you instant hot water without the complexity of a mixer tap or power shower system. The job requires a dedicated electrical circuit, adequate cold water supply, correct wall substrates, and proper waterproofing. Getting the electrical work certified under Part P is not optional; it is a legal requirement.
The difference between a trouble-free installation and one that causes ongoing problems usually comes down to preparation: checking water pressure, selecting the right cable size, using moisture-resistant substrates, and sealing every joint at the bath-to-wall junction. A properly installed electric shower, with every connection tested and certified, will run reliably for years.
If you are considering an electric shower installation over your bath, contact us at Mermaid Designs for a survey and fixed-price quote. We will assess your water system, consumer unit, and wall condition, then handle the full installation, including certification and aftercare.